Let's be honest. You probably brought home that stunning bromeliad with the fiery red or pink flower spike because it looked absolutely unreal. It sat on the shelf at the store, looking plastic-perfect, and you thought, "How hard can it be?" Then you get it home, and the questions start. Do I water the soil? The cup in the middle? Why are the leaf tips turning brown? And the big one – what happens after this gorgeous flower inevitably fades? If you're nodding along, you're in the right place. I've killed my share of bromeliads by following bad advice, but I've also kept them thriving and even got them to produce pups (baby plants) multiple times. This guide cuts through the noise and gives you the straightforward, experience-tested care tips that actually work.
What You'll Learn in This Guide
- How Much Light Do Bromeliads Really Need?
- Watering Bromeliads: The Central Cup Method Demystified
- The Right Soil and Potting Setup (It's Not What You Think)
- Creating the Perfect Humidity Without a Fancy Setup
- To Feed or Not to Feed: A Simple Fertilizer Strategy
- The Post-Bloom Phase: What *Actually* Happens Next
- Propagating Pups: How to Get Free New Plants
- Solving Common Bromeliad Problems (Brown Tips, No Color, etc.)
How Much Light Do Bromeliads Really Need?
The "bright, indirect light" advice is everywhere, but it's too vague. From my experience, most common bromeliads like Guzmanias, Aechmeas, and Vrieseas want light similar to what a Phalaenopsis orchid prefers. Think near an east-facing window where they get gentle morning sun, or a few feet back from a south or west window, shielded by a sheer curtain. The light should be bright enough to cast a soft, defined shadow.
Here's the non-consensus part: many people panic and shove their bromeliad into a dark corner, fearing direct sun. While direct hot afternoon sun will scorch the leaves, too little light is a silent killer. It leads to a slow, sad decline: the colors (especially on variegated types like Neoregelia) fade to dull green, the plant stops growing, and it will never produce a vibrant flower spike or colorful central cup. If your bromeliad is all green and leggy, it's begging for more light.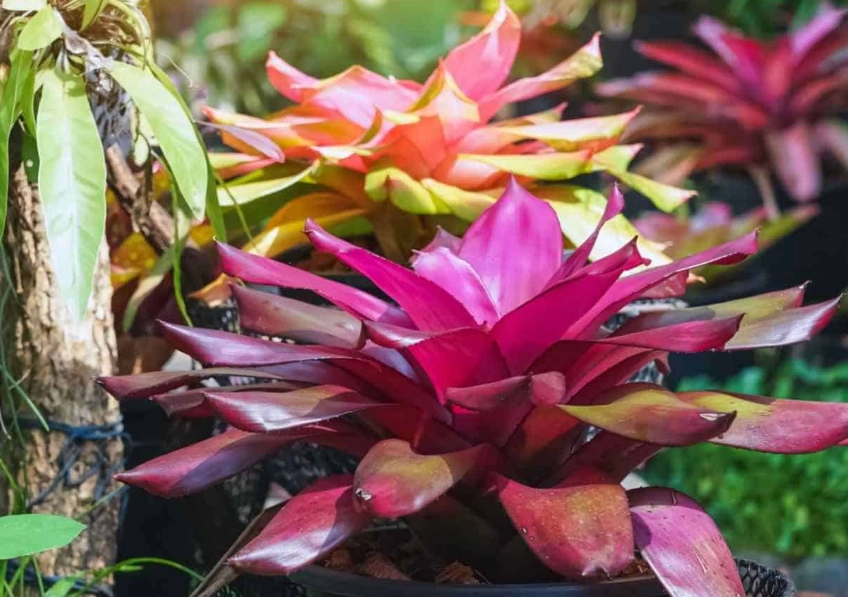
Watering Bromeliads: The Central Cup Method Demystified
This is the make-or-break factor. Bromeliads are epiphytes in nature, meaning they grow on trees, not in the ground. They've evolved to collect water in a central tank or "cup" formed by their leaves.
But here's the critical detail most guides miss: you must flush the cup regularly. I do this every 4-6 weeks. Simply tip the plant over the sink or shower and let all the old water run out. Refill it with fresh water. Stagnant water in the cup is a recipe for rot and a mosquito breeding ground. I learned this the hard way with a beautiful Aechmea that developed a foul smell at its base.
What about the soil? The potting mix should be lightly moist, not soggy. Water the soil only when the top inch feels dry to the touch. In winter, this might be once every 3-4 weeks. Overwatering the soil is the fastest way to rot the roots.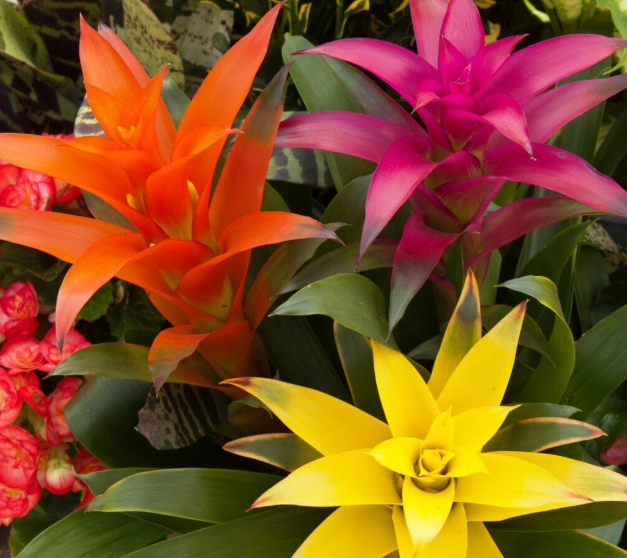
| Watering Location | How To | Frequency | Pro Tip / Warning |
|---|---|---|---|
| The Central Cup (Tank) | Pour water directly into the leaf rosette until it's 1/4-1/2 full. | Keep topped up. Flush and refresh completely every 4-6 weeks. | Use soft water. Avoid letting the cup stay empty for prolonged periods. |
| The Potting Mix (Roots) | Water thoroughly until it drains from the bottom. | Only when the top 1-2 inches of mix are dry. | Err on the side of underwatering. Soggy soil = root rot. |
| Misting & Air Roots | Lightly mist the leaves and any visible aerial roots. | 2-3 times a week in dry indoor air. | Good for humidity but does not replace cup watering. Do it in the morning. |
The Right Soil and Potting Setup (It's Not What You Think)
Forget regular potting soil. It holds too much moisture and will suffocate the roots. You need a mix that is airy, chunky, and fast-draining.
My go-to homemade mix is:
50% Orchid Bark (medium grade)
30% Coarse Perlite
20% Coconut Coir or a tiny bit of peat moss
This mimics their natural tree-perching environment. The roots need air as much as they need moisture.
Pot choice matters. Always use a pot with excellent drainage holes. Terracotta pots are great because they wick away excess moisture. The pot should be relatively small—bromeliads have small root systems and prefer being slightly pot-bound. A pot that's too large holds wet soil for too long.
Creating the Perfect Humidity Without a Fancy Setup
Bromeliads thrive in 50-60% humidity. Most homes sit around 30-40%, especially with AC or heating. Brown, crispy leaf tips are the classic sign of low humidity.
You don't need a humidifier (though it's great if you have one). Here are practical fixes:
- The Pebble Tray: Set the pot on a shallow tray filled with pebbles and water. The pot should sit on the pebbles, not in the water. As the water evaporates, it raises humidity right around the plant.
- Grouping: Cluster your bromeliad with other humidity-loving plants. They create their own microclimate.
- Bathroom Buddy: If you have a window in your bathroom, it's an ideal spot. The steam from showers provides perfect humidity boosts.
Temperature is easy: they like the same range you do. 60-80°F (15-27°C) is perfect. Avoid drafts from heating vents, air conditioners, or cold windows.
To Feed or Not to Feed: A Simple Fertilizer Strategy
Bromeliads are light feeders. Over-fertilizing is worse than not feeding at all. It can burn the leaves and roots and cause the colors to turn muddy green.
I use a balanced, water-soluble fertilizer (like a 10-10-10 or 20-20-20) but at one-quarter strength. And here's the trick: apply it to the central cup, not the soil. The leaves absorb nutrients more efficiently than the roots. Do this once a month during the active growing season (spring and summer). Do not fertilize in fall and winter.
The Post-Bloom Phase: What *Actually* Happens Next
This is the most common point of confusion. A bromeliad blooms once, and that bloom can last for months. But eventually, the colorful flower spike (the inflorescence) will start to turn brown and die back. This is a natural process, not a failure on your part.
The mother plant will not bloom again. However, as it nears the end of its life cycle, it will start producing offsets, called "pups," around its base. Your job is to keep caring for the mother plant (continue watering the cup and soil as normal) because it is using its energy to nurture these pups. The mother plant will slowly decline over the next year or so as the pups take over.
Propagating Pups: How to Get Free New Plants
Once the pups are about one-third to one-half the size of the mother plant and have developed their own few roots, you can separate them. I wait until they have a few small roots of their own; it gives them a much better head start.
Step-by-step:
1. Remove the entire plant from its pot.
2. Gently shake off the potting mix to see where the pup connects to the mother.
3. Using a clean, sharp knife, cut the pup away, ensuring it takes some of its own roots with it.
4. Let the cut end callous over for a day in a shady spot.
5. Pot the pup in a small pot with the fast-draining mix described earlier. Water the soil lightly and put a small amount of water in its new central cup.
6. Care for it as you would an adult plant. With good light, it may flower in 1-3 years.
Solving Common Bromeliad Problems (Brown Tips, No Color, etc.)
Let's diagnose the visual cues your plant is giving you.
Why are the leaf tips turning brown and crispy?
This is almost always a water quality or low humidity issue. You're using hard tap water with high mineral content (fluoride, chlorine, salts) or the air is too dry. Switch to filtered/rainwater for the cup and increase humidity via misting or a pebble tray.
The center of the plant (cup) is turning brown/black and mushy.
Rot. This happens from stagnant water in the cup, especially in low light or cool conditions. You didn't flush it often enough. Sadly, if the central growth point is rotted, the plant is a loss. But check for pups! You can still save them.
My bromeliad is all green and not showing its bright colors.
Insufficient light. The plant is in survival mode. Gradually move it to a brighter location (avoid direct harsh sun immediately to prevent scorching). For varieties like Neoregelia that color up in the center, good light is essential for that brilliant flush of red or pink.
There are small bugs on the leaves or in the cup.
Likely aphids or mealybugs. They can be rinsed out with a strong stream of water (tip the plant to avoid filling the cup with dirty water). For persistent issues, a cotton swab dipped in rubbing alcohol can be used to dab individual pests. Keeping the cup fresh helps prevent them from settling in.
Your Bromeliad Care Questions, Answered
Can I use ice cubes to water my bromeliad like some stores suggest?
I strongly advise against it. The idea is that ice melts slowly, preventing overwatering. But placing ice directly in the central cup or on the soil can shock the tropical plant's roots and leaves, causing cell damage. It's a gimmick. Using room-temperature water is safer and more effective.
How do I get my bromeliad pup to flower? It's been years and it's just leaves.
Maturity and light are key. The pup needs to be mature, which can take 1-3 years. Ensure it's getting enough bright, indirect light. There's an old trick that often works: enclosing the plant (pot and all) in a clear plastic bag with a ripe apple for 7-10 days. The ethylene gas the apple gives off can trigger flowering. Just make sure no condensation drips into the cup and cause rot.
Is it normal for the mother plant to look terrible after producing pups?
Yes, completely normal. It's a monocarpic plant, meaning it flowers once and then dies. Its final act is to produce offspring. The leaves may brown and wither from the outside in. As long as the pups are healthy, you've succeeded. You can cut away the dying mother leaves as they brown, or remove the entire mother plant once the pups are well-established.
Can I plant my bromeliad outside?
In frost-free climates (USDA zones 10-11), many bromeliads can thrive outdoors in shaded, protected areas. In temperate climates, they make excellent summer patio plants but must be brought indoors well before the first frost. Always acclimate them slowly to outdoor conditions to avoid sunburn.
The key to bromeliad care is understanding their unique structure. They're not like your pothos or snake plant. Once you master the cup-watering-and-flushing routine and provide decent light, they become incredibly low-maintenance and rewarding. That dramatic bloom is worth the wait, and the cycle of growing pups gives you years of enjoyment. For further reading on specific genera, resources like the Missouri Botanical Garden plant finder or the Bromeliad Society International offer detailed genus-specific sheets.
This guide is based on hands-on experience and cross-referenced with authoritative horticultural sources.